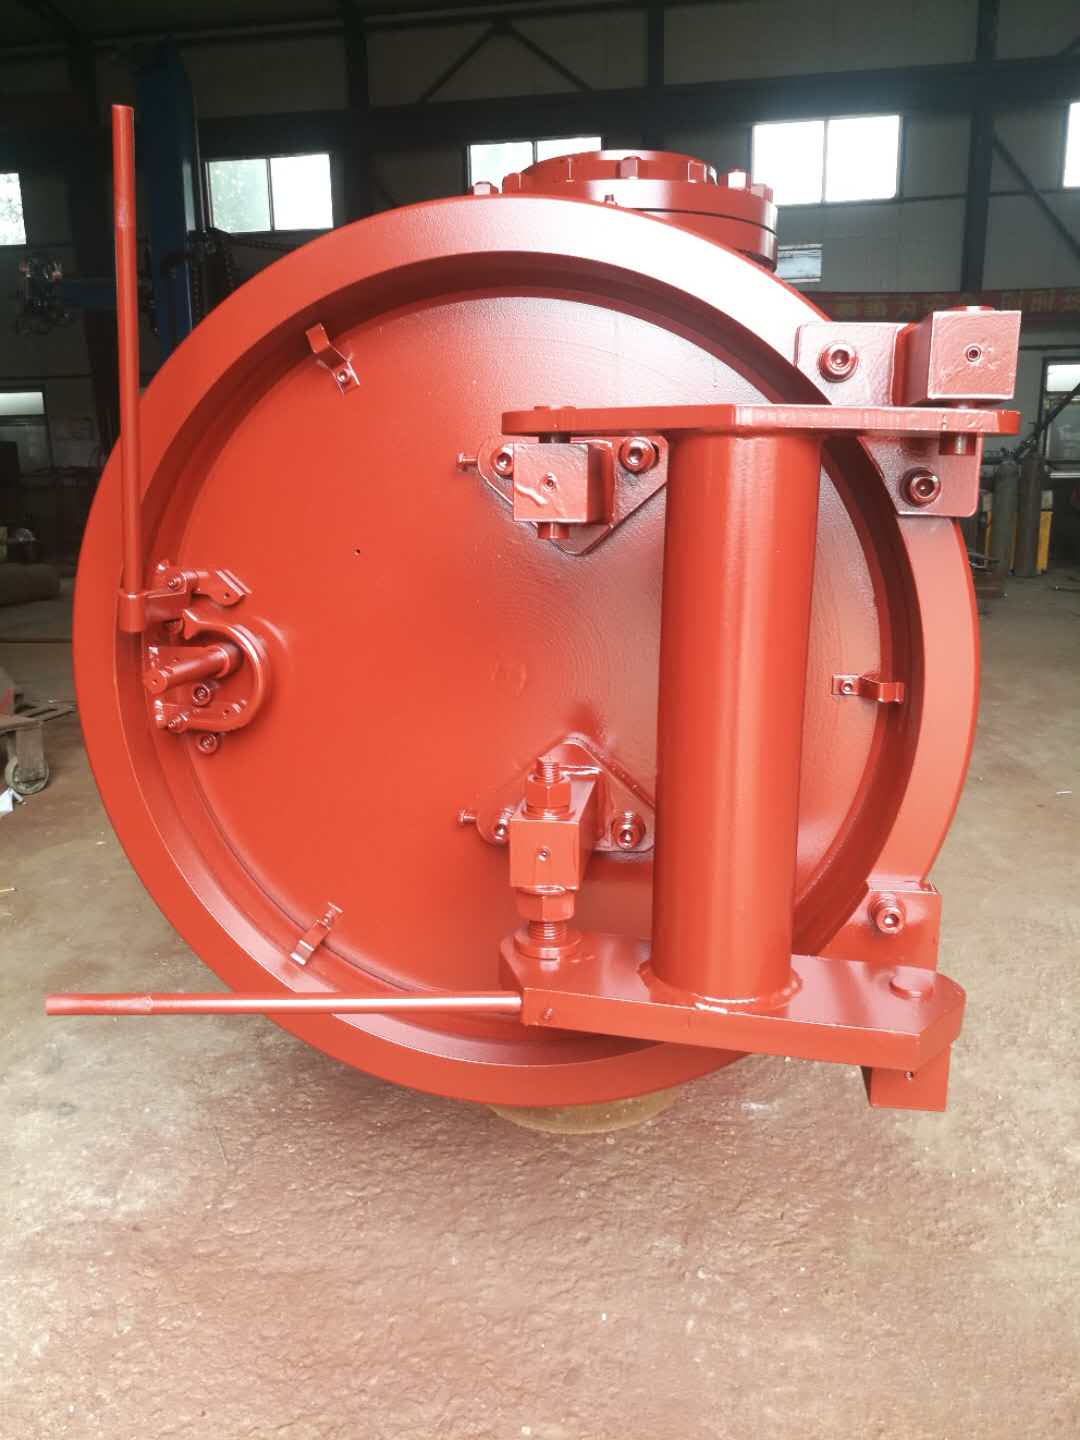
الفرقة قفل ASME فتح سريع الإغلاق مقدمة
2018-09-18 13:39

![]()
![]()


![]()
![]()


Band Locking Quick Opening Closure Operation Methods
Notice before operation:
● check the instrument instructions whether are normal;
● Check the container and the quick opening closure all connections should be leak-free;
● Necessary explosion-proof tools, fire extinguishers, fire mats and other facilities are fully prepared;
● Opening and closing QOC operation by one person other staff custody;
● In the process of opening and closing the front of the QOC can not stand people;
1.1 QOC opening
1) Check the container inlet and outlet valves are completely closed.
2) Open the vent valve and vent until observed at zero pressure.
3) When there is possible FeS powder or sediment in the equipment, wet work should be performed by injecting about 10% of the equipment volume of clean water into the equipment through the pressure gauge bleed valve on the equipment or pipe. After the wet work, the container is dried and qualified Can be put into operation again.
4) Loosen the safety interlock (bolt) slowly, check for residual pressure in the container, and if there is a residual pressure, tighten again. Remove the safety interlock until it is confirmed that there is no residual pressure.
5) Turn the handle counterclockwise 180 degrees to start the drive chain and the horse hoof mechanism and gradually retract the locking tape to the door groove.
6) Then remove the omnidirectional handle and use the door hinge handle to rotate the door open.
1.2 QOC Closing
1) Check the seal whether is intact and the installation direction is correct.
2) Make sure the seal and sealing surface are clean.
3) Grease the sealing groove, sealing surface and chain sliding surface.
4) gently push the door forward, when the edge of the blind plate contact with the door, the door forced to promote the blind neck.
5) Make sure the door is pushed in place and use a wrench to turn the screw clockwise. Until the blind and card board safety interlock inside and outside the aperture center.
6) Confirm that the safety interlock gasket is intact and install the safety interlock.
Maintaining
Check the sealing of the quick opening closure and ensure no damage.
Check the “door” whether in the middle of the“neck”.
Maintaining of Quick Opening Closures
Turn-on Quick Opening Closures
1.Open the quick opening closure and take out sealing ring from the door. Check the surface of sealing ring. If the sealing surface has mechanical damage should change it; if not, clean it by cloth with degreaser and keep the sealing ring dry and put it in clean place for storage.
2.Check sealing groove. If it has corrosion and dirt shall use high quality abrasive paper to clean and dry with a cloth.
3.Check the neck part of blind plate and touch part of door and groove of the door. If they have dirt and corrosion (especially in bottom)shall use abrasive to clear up and dry with a cloth.
4.After the above places are all clean smear /apply silicone oil and other similar oil (lithium grease).The place needed grease including:
A)Groove (after smear the bottom of sealing ring, and install the sealing ring. The surface of sealing ring that outward side is needed greased too);
B)After door closed the contacting surface after closed the door with inside neck part;
C)Surface of lock and door (contact segment of seal ring and barrel).
Turn-off of Quick opening closures
After quick opening closure is turned off the pressure vessel should be gradually pressurize and dividing into three steps, low pressure (0.1-0.2MPa), middle pressure(1/2 of main line pressure under current running condition ) and high pressure (main line pressure under current running condition). Every step should have at least 20 minutes internal, at the same time should take detection constantly by flammable gas detector.
Quick Opening Closure Leakage Treatment
1.Take away the sealing ring from groove, and confirm sealing groove have not damage.
2.Take away old sealing ring and clean up the sealing groove, and then smear some grease.
3.Press sealing ring into the top groove and ensure sealing placed in center of groove, and then press the sealing ring into groove symmetrically.
